
Can You Make Soap Without Lye?
Lye might sound scary, and it is, but can you make soap without it? Learn some soap recipes to safely use this ingredient.
Looking to make soap without lye?
Smart! You want to avoid the dangers of this harsh chemical.
Lye is drain cleaner after all. Why would anyone want to use it?
Unfortunately, I’m going to burst your bubble. YOU CANNOT MAKE SOAP WITHOUT LYE.
I remember scouring the web for hours looking for a way to make soap without lye. Determined there was a way. Maybe you’re in the same place.
I never discovered the secret to a lye free soap. Because there isn’t one…
BUT there is a way to customize your soap without handling lye. There’s one catch… The soap base you use will originally be made using lye. YOU just won’t have to handle the lye.
Pretty cool right??
Handmade soap with lye produces a superior product to the two methods below. But…. It’s a pretty good trade-off for not handling lye.
Why Make Your Own Soap?
When I started using handmade soaps in our home, I did not make them. I bought them from a supplier on Etsy. Now I sell my handmade soaps on Etsy!
Maybe you’re at the same point in your life. Or maybe you’re still using the store-bought stuff.
If you are, I encourage you to make the swap to handmade soaps. There are some not so good for you ingredients in store-bought soaps.
I felt the push to switch to natural soaps in hopes to get my son’s eczema under control. I’d read countless stories from others. Stories that goats milk soap soothed away eczema and irritation.
It didn’t work that way for us.
The skincare changes alone did not heal his eczema.
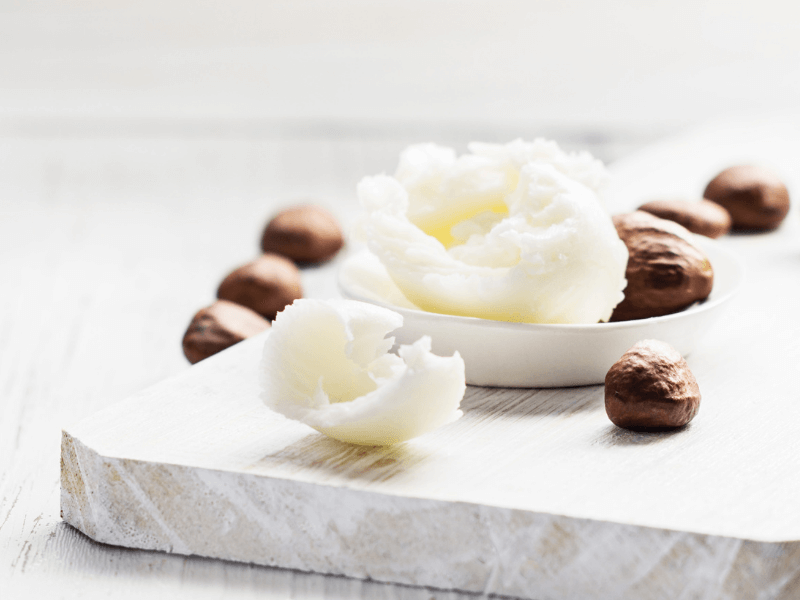
What finally made it better? A combination of the skincare changes, diet changes, and the use of shea butter lotion.
After a while, I got spoiled with handmade soaps. I didn’t want to go back to the store-bought stuff.
But the cost of those handmade soaps was adding up. With 6 people in our family, we seem to go through a lot of soap. It could have something to do with my kids dropping the bar of soap into the bath yet waiting 10 minutes to find it. I swear they sneak it in the tub when I’m not looking. Hmmm….
So, I finally took the plunge and made my own soap.
Is Soap Making Really that Scary?
The first time making soap is intimidating. It was for me.
Learning to ride your bike for the first time was intimidating too. You risked falling off your bike. Scraping your knees or worse yet, breaking a bone. Yet you persevered. Right?
Doing anything for the first time is a little scary.
Maybe you’re thinking…
What if I blow up the house?
Or if the soap batch fails and I’m left with a toxic mess to clean up.
What if I hurt myself or someone in my family?
I promise, with a little precaution it is NOT SCARY to make soap with lye.
I make my own soaps and use lye on a regular basis. Even with 4 little ones in my house. With proper precautions, you can too.
I’m going to share some tips on how to handle lye below AND a vegan soap recipe.
But let’s get back to those two ways to customize your own soap WITHOUT handling lye.

How to Rebatch Soap
If you’re already buying handmade soaps, then this is the technique for you.
You can either grate up some bars of handmade soap or use soap scraps.
What are soap scraps? The little bits of soap left at the end of the bar. Many people throw them in the trash.
We keep all our old soap scraps.
Whichever soap base you’ll use, the method is the same.
Add the grated soap or soap scraps to an old crockpot. Add a little bit of water so you don’t burn the soap.
Let it melt until it’s a mashed potato consistency. Stir as little as possible because it will get soapy. Yet stir enough that the soap doesn’t burn. As long as you have enough water and have the crockpot set to low, you should be good to go.
Once you melt the soap, customize your rebatched soap with essential oils and herbs.
This is my favorite way to add essential oils to soaps.
Essential oils are delicate. Once you combine the oil, water, and lye to make soap, the batter gets very hot. Which is bad news for essential oils.
I prefer this method since the soap does not get nearly as hot as traditional cold process soap., preserving the therapeutic benefits of the essential oils.
I’ve had my older children help me to rebatch soap; it’s a great way to get them in on the action.
The downside of rebatched soap is the consistency.
That mashed potatoes consistency will show in your finished soap product. It does not look like the smooth consistency of cold process soap.
Rebatched soap works just as well as cold process soap without all the unwanted ingredients, AND you get to customize it!!
Melt and Pour Soap
This is probably the most common way you’ll read about to make soap without lye.
At first it sounds awesome! The finished product is smooth like cold process soap.
There are two downsides:
- The ingredients - Many melt and pour soap bases are no better then what you’re buying in the store. All with a bigger price tag.
- Melt and pour soaps are inferior to cold process soaps. Personally, I feel most are slimy. Many contain detergents that dry out your skin.
Melt and pour soaps are pretty, but most melt and pour soap bases are not something I’m excited about using.
Here’s a nice goats milk melt and pour soap base
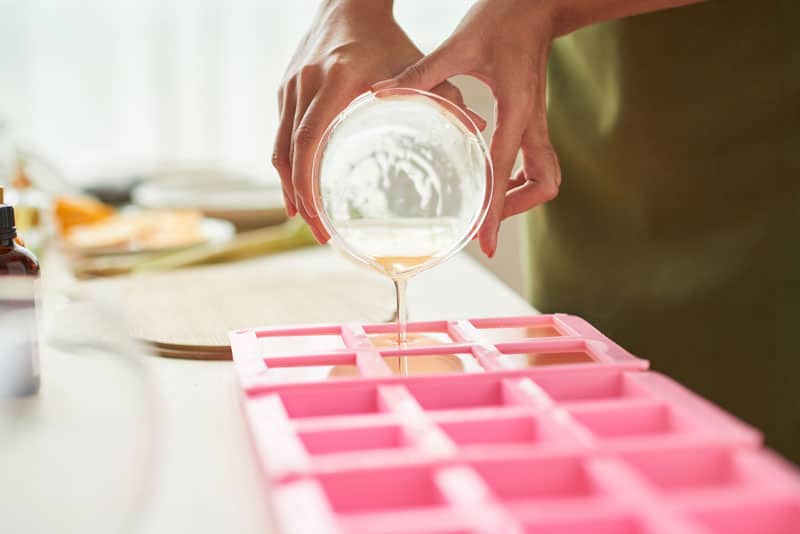
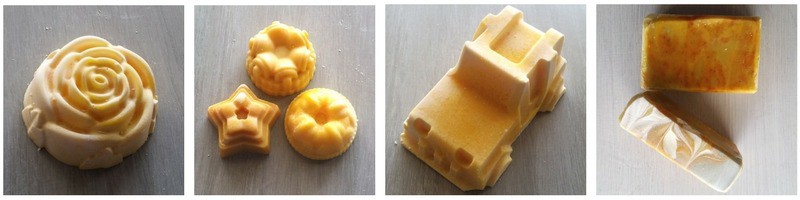
Melt and pour soap usually comes in chunks. Just break off how much you want to make. Then melt it on the stovetop in a double boiler or melt it in the microwave.
Then add your colorant and essential oils before pouring it into your molds.
Let it harden and you’re in business. The soap is ok to use once it hardens….
Easy peasy.
If you’re ready to take the plunge and make your own soap… keep reading!
Lye Safety
Lye is a dangerous chemical. It’s the main ingredient in most drain cleaners. For good reason, it eats away at what it touches.
NOT something you want on your skin.
I bet you have a bottle of drain cleaner in your home somewhere…. Or something as dangerous.
I remember I had a bottle of floor stripper under the bathroom sink. We kept that cabinet locked with a child lock. Floor stripper is nasty stuff.
Thankfully I’ve since cleaned up my cleaning supplies with simple, natural alternatives. I no longer have to worry about my kids and what’s under my sink.
Remember, treat lye as you would any other chemical in your home. Lock it up!
I have a lock box under my kitchen sink with a padlock on it. That’s where my lye lives. A little overkill? Maybe. I’d rather err on the side of caution.

Tips for Working with Lye
Always pour lye into the other solution.
When you make soap, you’ll first make lye water. Which is just like it sounds, lye mixed with some water.
Measure your water and lye separately. Then slowly pour your lye into your water. I wear a face mask to avoid breathing the fumes and put the vent fan on in the kitchen.
It will produce a strong smell when you combine the lye and water. And a chemical reaction. As the two ingredients combine, the mixture will get very hot.
Then when you’re ready to combine your lye water and oils…. Same thing.
Pour your lye water into your oils. Slow and steady so you don’t splash.
Avoid Distractions
Distractions are the biggest cause of accidents with lye.
Make soap when children and pets are not around. I make soap in my kitchen when the kids are all asleep. Not just in bed, but asleep.
While it’s not the ideal time, it gives me the focus I need.
Vinegar to the Rescue
If you spill a little lye water, spray some vinegar on it. It will neutralize the lye.
If you get lye water on your skin, FIRST wash your skin with cool water. Then wash the area.
DON’T put vinegar on it. I’ve made this mistake, bad advice.
The vinegar neutralizes the lye but it must heat it up too. In my case, it made my burn worse. I could have avoided a burn altogether if I just washed it. I caught the splash immediately.
Wear Proper Safety Equipment
That leads me to proper safety equipment. Super important.
I wear chemical resistant gloves. But regular rubber kitchen gloves would work.
Wear a mask when you pour the lye into the water.
It’s important to protect your work surface too. Since I work in my kitchen, the last thing I want is some lye granules hanging around on my counter.
Line your counters with newspaper. It’s easy to wrap it all up and throw it into the trash.
Sometimes I use a cardboard box to measure my lye. Some of those lye beads can be unruly. If that happens to you, use an unscented dryer sheet. Wipe down the outside of the lye bottle before pouring. Paying close attention to the mouth of the bottle. Static electricity is the problem. That’s why I prefer the lye flakes.
Beginner Soap Recipe
Now that we’ve covered the basics of handling lye. Let’s get to the recipe. I hope you’re up for the challenge. Or here's another cold process soap recipe using tallow. Need more? Try out making luxurious goat milk soaps or refreshing tumeric soaps! There are plenty of recipes for you to try, which ones are going to be your favorites!?
Making your own cold process soap is a fun experience!
Beginner Soap Recipe
We'll go through the basic steps to make this soap, but this is not a soap making tutorial. I'm assuming you've already comfortable with cold process soap making.
Instructions
- Measure your oils. Heat solid oils so everything is a fluid liquid. Combine all your oils and give it a good stir with your stick blender.
- Put on your safety gear. Measure your water and lye.
- Add lye to the water. NEVER add water to lye. ALWAYS add lye to your water. Add lye slowly and stir until combined. See Lye Safety section above for more tips.
- Slowly pour your lye water into your oil mixture. I pour the lye water down the shaft of my stick blender to avoid splashes.
- Make sure your immersion blender is fully submerged and begin blending. Blend until a light trace is achieved.
- Add your fragrance if desired and pour into your mold.
- Let your soap cure for 24 hours before unmolding. Once unmolded, your soap should cure for 4-6 weeks to fully harden.
- Enjoy your new soap!!
Recommended Products
As an Amazon Associate and member of other affiliate programs, I earn from qualifying purchases.
What Type Did you Choose?
Now that you know 3 different ways to make soap AND customize it… which will you choose?
They all have their pros and cons. There is no one size fits all.
It’s all about your preferences and comfort zone.
Hello Shannon, Thanks for your recipes. I have two comments: which is the difference between lye and potasium hydroxide and second,, can you leave the soap liquid to use it as body wash?
Thanks
Hi Mague!
You have asked two fantastic questions!! Lye or sodium hydroxide is used in most soap making applications. Potash or Potassium Hydroxide is what you use to make liquid soap.
I use Sodium Hydroxide in cold process soap. I use Potassium Hydroxide to make liquid soap paste.
When you make soap batter, it will be liquid at first. So you pour it into your mold. Gradually the soap gets harder and harder. There is no way to keep it liquid. You want the soap to get hard and go through the whole process so that no lye remains.
You can put your freshly made bar of soap into some water and let it dissolve. It's usually pretty soft the first few days. Then just use that as body wash. Although I find it gets kind of slimy.
Instead I make soap with Potassium Hydroxide to make a soap paste specifically designed to dissolve in water and not get slimy.
While I've made many batches of regular cold process soap, I've only made liquid soap a handful of times. It lasts a really long time and is a great alternative to buying castile soap. I also use it as laundry detergent using 100% coconut oil soap. It's fabulous!
Anyway... here is a link on how to make liquid soap from Tracy over at Oh The Things We'll Make - she has the tutorial I followed to make soap paste. Again the soap paste easily dissolves in water and does not get slimy. It's pretty awesome stuff! But it's made like hot process soap in the crockpot.
I hope I've answered your questions - they were awesome questions!! Sounds like you've been doing your homework. Hope you take the plunge and make some soap soon 🙂 It's fun!!
Hiya, you talked about the essential oils getting damaged from the heat using the lye... what is the best way to do the soaps while keeping the benefits of the oils in there? You said using old soaps or cutting up other soaps and heating them and that way it doesn’t get so hot and damage the oils, is that right or did I get that wrong? ?? Anyway would it be better to make the soap with lye then remedy later and add oils?